- Heat your oven to 450. (Incidentally, this would be a good time to warm up that little pretzel bread thing that you picked up at Trader Joes because they advertise it in the 'underwriter plug' on NPR.)
 Split and seed a butternut squash, and just throw it on the oven rack. Roast until slightly soft, meaning you can stick a fork in it with some effort.Coarsely chop some sweet white onion - I used a little less than half a big one.Heat up your trusty giant cast-iron skillet, and slick it with olive oil.Drop in a couple big spoonfuls of Patak's Curry Paste (don't let the oil that collects on top bother you. Don't stir, just spoon.) Once the curry paste starts bubbling, you'll feel nervous that it's going to burn into a layer of asphalt (hardly out of the question) so throw a little water in there, and the onions, and stir it around.Check on the squash. If it's sort of soft, remove it from the oven. You can now peel it with your (overn-mitted) hand, by breaking and pulling off the thin crisp blistered skin.Once your onion is a little soft too - solid but not crisp or hard - cube your peeled squash and throw that in the pan with the onion and curry paste. Stir to get the dark orange stuff to coat the brighter orange stuff.Now. open a can of coconut milk. Reduce the heat under the pan to medium-high, and pour in some coconut milk, stirring until the dark-orange is also brighter orange.Cook for about 5 minutes to give the flavors a chance to mingle. Serve in bowl, eat with spoons. Half a large squash fed two starving adults.
Showing posts with label vegetarian. Show all posts
Showing posts with label vegetarian. Show all posts
Wednesday, September 25, 2013
Curried Butternut Squash - fast, easy, vegan

Tuesday, June 18, 2013
Recipe: Gluten-free Banana Bread
Preheat your oven to 350, and find a glass loaf pan.
Melt half a stick of butter (that's 4 tablespoons) and let it cool.
(If you're melting it in the microwave, keep a darn eye on it and stop it as soon as it melts, otherwise the solids will explode all over the inside of your appliance. It's gross.)
(Next, time, I will try this with coconut oil.)
Mash (or mix in your mixer) 3-5 ripe bananas. They should be super, super liquidy and make more than a cup of liquid banana goop. Mix in 1 cup sugar (I combined brown and white) and 1 egg. then that cooled melted butter (if its too far above about 80 degrees, it'll cook bits of egg.) Add a big swig of vanilla extract, and any likely-looking spices. I used quite a lot of Penzey's Pumpkin Pie spice. It was awesome.
Turn off the mixer once all that is combined. Now dump in 1.5 cups of rice flour (mine was 2/3 brown, 1/3 white), a scant tablespoon of baking soda, and a generous teaspoon of salt.
Turn the mixer on LOW and only mix it until everything is barely moistened. Large veins of dry baking soda or snowdrifts of flour are undesirable; however, lumps are fine.
Grease your loaf pan (with butter) and transfer the batter into it. It is heavy, thick and lumpy. It is brown. It does not look or pour like cake batter. It'll be okay. Seriously.
If you want to add walnuts (or black walnuts), I recommend sprinkling them on top. I have a firm 'no surprise nuts' policy, but there's actually a better reason. Having them on top allows the nuts to toast, which makes them taste lots better, and be crunchy. (It also moderates the distinctive but occasionally weird green note in good black walnuts. I think it's a perfect flavor for this bread, but can be overwhelming unless they're toasted.)
After putting the pan in the oven, lower the temp to 325. DO NOT open the oven for 45 minutes.
Begin checking at 45 minutes with the stab-with-a-butterknife method. The timing is quite changeable - could be done after 45 minutes, but occasionally takes more than an hour. I think it's because of the banana variable. When the butterknife finally comes out moderately clean - with actual moist crumbs stuck to it, rather than batter - it's done.
This came out moist, tasty, and with a good texture - springy but in no way rubbery. It looked nice, too, and the family ate it enthusiastically. Oddly, it did not have a very strong banana flavor - it was there, but not as banana-y as I would have expected.
This loaf took a long time to get done in the middle, and I worried that the ends would be overdone and hard or gummy - but they totally weren't. I was also worried that the middle would be gritty, but that's what I get for licking the knife - but, again, not at all. Good consistent texture and rise throughout the loaf. Deep carmelized sugar flavor.
Anyway, it was good.
I might add chocolate chips next time.
This is a rice flour adaptation of the wheat flour recipe I always use. (I happen to have noted, on the page of my recipe notebook, that my brother and I made it on July 15, 1996.) From Easy Basics for Good Cooking.
Melt half a stick of butter (that's 4 tablespoons) and let it cool.
(If you're melting it in the microwave, keep a darn eye on it and stop it as soon as it melts, otherwise the solids will explode all over the inside of your appliance. It's gross.)
(Next, time, I will try this with coconut oil.)
Mash (or mix in your mixer) 3-5 ripe bananas. They should be super, super liquidy and make more than a cup of liquid banana goop. Mix in 1 cup sugar (I combined brown and white) and 1 egg. then that cooled melted butter (if its too far above about 80 degrees, it'll cook bits of egg.) Add a big swig of vanilla extract, and any likely-looking spices. I used quite a lot of Penzey's Pumpkin Pie spice. It was awesome.
Turn off the mixer once all that is combined. Now dump in 1.5 cups of rice flour (mine was 2/3 brown, 1/3 white), a scant tablespoon of baking soda, and a generous teaspoon of salt.
Turn the mixer on LOW and only mix it until everything is barely moistened. Large veins of dry baking soda or snowdrifts of flour are undesirable; however, lumps are fine.
Grease your loaf pan (with butter) and transfer the batter into it. It is heavy, thick and lumpy. It is brown. It does not look or pour like cake batter. It'll be okay. Seriously.
If you want to add walnuts (or black walnuts), I recommend sprinkling them on top. I have a firm 'no surprise nuts' policy, but there's actually a better reason. Having them on top allows the nuts to toast, which makes them taste lots better, and be crunchy. (It also moderates the distinctive but occasionally weird green note in good black walnuts. I think it's a perfect flavor for this bread, but can be overwhelming unless they're toasted.)
After putting the pan in the oven, lower the temp to 325. DO NOT open the oven for 45 minutes.
Begin checking at 45 minutes with the stab-with-a-butterknife method. The timing is quite changeable - could be done after 45 minutes, but occasionally takes more than an hour. I think it's because of the banana variable. When the butterknife finally comes out moderately clean - with actual moist crumbs stuck to it, rather than batter - it's done.
This came out moist, tasty, and with a good texture - springy but in no way rubbery. It looked nice, too, and the family ate it enthusiastically. Oddly, it did not have a very strong banana flavor - it was there, but not as banana-y as I would have expected.
This loaf took a long time to get done in the middle, and I worried that the ends would be overdone and hard or gummy - but they totally weren't. I was also worried that the middle would be gritty, but that's what I get for licking the knife - but, again, not at all. Good consistent texture and rise throughout the loaf. Deep carmelized sugar flavor.
Anyway, it was good.
I might add chocolate chips next time.
This is a rice flour adaptation of the wheat flour recipe I always use. (I happen to have noted, on the page of my recipe notebook, that my brother and I made it on July 15, 1996.) From Easy Basics for Good Cooking.
Monday, May 13, 2013
Recipe: Curried Quinoa thing

While that's cooking, slice some red and yellow peppers that you found (also softening) in the (poorly-named) "crisper". About the equivilent of one large pepper (which is what's left when you excise the iffy parts.) Cut into small dice. Don't do anything with them yet. If you find you have a cucumber, peel and dice that as well, and set it aside.
If the onions are turning golden, it's time to drop in the cooked quinoa. (You can cook some fresh - take the onion pan off the stove, tell everyone dinner will be 10 minutes later than you had said, and cook according to package directions. I had some left over - most of a cup.)
Open and rinse a can of chick peas. Throw those in with the quinoa and the onions. Turn down the heat - a little crispy brown in awesome, but blackened is not delicious. Splash in a little water if you're worried about burning. Throw in the diced peppers.
Stir in a large spoonful of Patak's curry paste. We use hot, but there's also milder. Let that cook for about 5 minutes. Remove from heat - stir in a handful of dried cranberries and cover, let it sit for a few more minutes.
Serve with salt, pepper, plain yogurt and the diced cucumbers on top. Bizarrely deliscious. Kinda beige, though.
Vegetarian (vegan without the yogurt), high protein, all the fiber you need. Very very good.
Tuesday, September 25, 2012
Bonus Recipe Links: Broccoli Gribiche plus.
Here's a link to the recipe I made this weekend. I loved it and it was hoovered up at a potluck.
Heidi Swanson's Broccoli Gribiche
which is, strangely, not on her own really excellent and beautiful website 101 Cookbooks
(home of the infamous Golden Crusted Brussels Sprouts which could not possibly be better )
but is in her terrific second cookbook Super Natural Every Day.
But the person who transcribed it on her own blog took some good step-by-step photos - I like step-by-step photos in a recipe, especially of the steps that make me say "Ew, that looks gross. That can't possibly be right, I must have messed something up." For example: whisking hard-boiled egg yolk and red wine vinegar together.

Obviously I'm babbling.
The end.
Heidi Swanson's Broccoli Gribiche
which is, strangely, not on her own really excellent and beautiful website 101 Cookbooks
(home of the infamous Golden Crusted Brussels Sprouts which could not possibly be better )
but is in her terrific second cookbook Super Natural Every Day.
But the person who transcribed it on her own blog took some good step-by-step photos - I like step-by-step photos in a recipe, especially of the steps that make me say "Ew, that looks gross. That can't possibly be right, I must have messed something up." For example: whisking hard-boiled egg yolk and red wine vinegar together.

Obviously I'm babbling.
The end.
Dinner tonight: Veggies, roasted, blanched and ravioli-ed
I posted this on Facebook, and the 'likes' seemed to be swarming, so I thought I would describe how I made it.
Preheat your oven to 400 degrees.
Into a large bowl, slice half a large white onion, about a cup of grape tomatoes, 2 cloves of garlic, half a gigantic red pepper, and whatever other leftover veg you have knocking around your fridge - I had about half a yellow squash. You can slice as thickly or thinly as you like - the thinner you slice, the sooner it will be ready. You don't have to slice the tomatoes much, though. Halving or just squishing them is fine.
Toss with a small splash of oil, either regular olive oil or flavored oil like that herby Basting Oil they were giving away at Wegman's last week. It's quite a nice thing to have around, incidentally. Sprinkle some salt in, toss to coat, and dump out onto a rimmed baking sheet. Spread out to make a mostly single layer (you don't have to be OCD about it.) Bake at 400 for about 20 minutes, and check it. You want the veggies to be soft, and some to have touches of brown but not entirely blackened. Mine took a total of 30 minutes. After the 20 minute check, put a pot of water on to boil. Once it boils, turn it down.
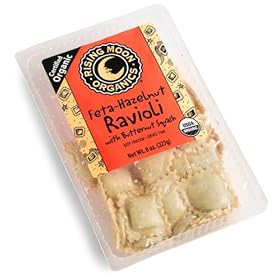
Now slide a whole 8 oz package of Rising Moon Organics Frozen Feta-Hazelnut Ravioli with Butternut Squash into the hot water. The package is covered with instructions that say Never cook ravioli in rapidly boiling water and Do not overcook! and I didn't, and you probably shouldn't either.
Immediately also drop in several big handfuls of cut kale. I bought mine in a bag at Trader Joes, and it was cut into about 1 inch pieces. So I recommend that size of bits if you have to cut your own.
The ravioli package directions say to cook for 8 minutes, and mine weren't quite as soft as one might hope, plus the kale was still really hard, so I let mine go a little longer - probably 10 minutes. Remove your veggies from the oven and put them back in the bowl they started in. Fish out your raviolis and kale and add them to the bowl. Toss everything together to spread the fabulous oil and veg juices around onto the pasta and kale. Plate. Eat. The kale is still a little crunchy after cooking for 10 minutes; the veggies are soft and carmelized, and the pasta is creamy/silky and absorbs the garlicy juices. Plus it's gorgeous. Plus it's 30 minutes.
My husband is constantly bugging me to 'write down that recipe!" Look, honey, I wrote it down. Go me.

Preheat your oven to 400 degrees.
Into a large bowl, slice half a large white onion, about a cup of grape tomatoes, 2 cloves of garlic, half a gigantic red pepper, and whatever other leftover veg you have knocking around your fridge - I had about half a yellow squash. You can slice as thickly or thinly as you like - the thinner you slice, the sooner it will be ready. You don't have to slice the tomatoes much, though. Halving or just squishing them is fine.
Toss with a small splash of oil, either regular olive oil or flavored oil like that herby Basting Oil they were giving away at Wegman's last week. It's quite a nice thing to have around, incidentally. Sprinkle some salt in, toss to coat, and dump out onto a rimmed baking sheet. Spread out to make a mostly single layer (you don't have to be OCD about it.) Bake at 400 for about 20 minutes, and check it. You want the veggies to be soft, and some to have touches of brown but not entirely blackened. Mine took a total of 30 minutes. After the 20 minute check, put a pot of water on to boil. Once it boils, turn it down.
Now slide a whole 8 oz package of Rising Moon Organics Frozen Feta-Hazelnut Ravioli with Butternut Squash into the hot water. The package is covered with instructions that say Never cook ravioli in rapidly boiling water and Do not overcook! and I didn't, and you probably shouldn't either.
Immediately also drop in several big handfuls of cut kale. I bought mine in a bag at Trader Joes, and it was cut into about 1 inch pieces. So I recommend that size of bits if you have to cut your own.
The ravioli package directions say to cook for 8 minutes, and mine weren't quite as soft as one might hope, plus the kale was still really hard, so I let mine go a little longer - probably 10 minutes. Remove your veggies from the oven and put them back in the bowl they started in. Fish out your raviolis and kale and add them to the bowl. Toss everything together to spread the fabulous oil and veg juices around onto the pasta and kale. Plate. Eat. The kale is still a little crunchy after cooking for 10 minutes; the veggies are soft and carmelized, and the pasta is creamy/silky and absorbs the garlicy juices. Plus it's gorgeous. Plus it's 30 minutes.
My husband is constantly bugging me to 'write down that recipe!" Look, honey, I wrote it down. Go me.
Thursday, July 08, 2010
Dinner Tonight: beans and cornbread in the crock pot

So we have this great crock pot, right? Actually, we have 2; for years, we've had a 1970 harvest gold one that belonged to Eric's family, and it still works fine.
But more recently, a friend of mine was upgrading to a more technical crock, and he gave me his excellent cooker. It looks like this:
(Well, said another friend, if you're ever called upon to make curry in a duck blind, or a tree stand, you're totally ready. )
Anyway, I made some really good beans tonight, and I wanted to tell you how to make them. I based them on a recipe in a magazine, and they're quite related to this recipe, but of course I had to do my own thing.
Place in slow cooker:
2 vidalia onions, sliced thin
2 peppers (I had a red and a yellow), sliced thin
Open a large can of beans (mine were Goya pink beans, 19+ oz) and rinse them really well, God only knows what that stuff in the can is. Add the beans to the pot.
Season with: 1 teaspoon cumin,
3 Tablespoons hot sauce,
as much leftover salsa as you have sitting around in jars in the back of the fridge,
frozen corn kernels (up to a whole bag),
2 Tablespoons brown sugar. Stir everything together and cook on low for 4-6 hours (or more.)
When you get home, check on the beans. Taste to adjust the seasonings - I added a splatter of ketchup and a small can of black beans. I also threw in a couple handfuls of greens. Stir. Turn the cooker up to high.
Now, mix up a batch of cornbread batter. I used Betty Crocker mix, which I picked because it didn't have trans fats.
While the batter thickens, sprinkle some shredded cheese on top of the beans. Then pour the batter on top of everything, spread it around, and cover the cooker. Cook on high until the cornbread bakes - it won't get fluffy, more like spoon bread than baked or skillet-ed cornbread - but it will solidify so that a knife poked into the center will come out mostly clean.
Not a low calorie meal, but meatless and very very satisfying. We loved it. I don't think I would have missed the cheese if I had skipped it, so no cheese next time.
Friday, November 13, 2009
(After) Dinner Tonight: P Party cake
We have our challenges, we parents. We parents of shockingly willful preschoolers. (At least, I am shocked. Oddly, no one else seems particularly shocked. Hmm.) Anyway, when he almost-willingly used a public restroom this afternoon, I declared that we would have a party. With cake.
This recipe is a cake I grew up with – it was a staple at class parties and church suppers, usually with no icing. The recipe is in plenty of places; I noticed it’s even in the most recent issue of Martha Stewart Everyday Food, where it mentions it’s in a new cookbook called “Mad Hungry.” It’s called Busy Day Cake there, which is a good name, and cooks.com calls it vinegar cake - but to me, it was always Crazy Cake. (Until today.)
This recipe has a ton of advantages. You mix, bake and serve it in one dish, so all you have to wash today is a measuring cup and 2 spoons. It’s vegan, it’s natural, it’s very cheap. But the reason I made it today – we were out of eggs. I felt that taking the little darling to the supermarket would be, um, pushing my luck. It’s definitely a ‘pantry staples’ dish.
Crazy Cake can turn out heavy, but the one I made today was quite light and flavorful and had nice textures - chewy outside, tender inside and a little touch of gooey at the center.
This recipe is a cake I grew up with – it was a staple at class parties and church suppers, usually with no icing. The recipe is in plenty of places; I noticed it’s even in the most recent issue of Martha Stewart Everyday Food, where it mentions it’s in a new cookbook called “Mad Hungry.” It’s called Busy Day Cake there, which is a good name, and cooks.com calls it vinegar cake - but to me, it was always Crazy Cake. (Until today.)
This recipe has a ton of advantages. You mix, bake and serve it in one dish, so all you have to wash today is a measuring cup and 2 spoons. It’s vegan, it’s natural, it’s very cheap. But the reason I made it today – we were out of eggs. I felt that taking the little darling to the supermarket would be, um, pushing my luck. It’s definitely a ‘pantry staples’ dish.
Crazy Cake can turn out heavy, but the one I made today was quite light and flavorful and had nice textures - chewy outside, tender inside and a little touch of gooey at the center.
Heat your oven to 350 degrees.
In a pyrex cassarole or an 8-inch square baking pan, whisk together:
1.5 cups flour, 1 cup sugar, 3 tablespoons unsweetened cocoa powder, 1 teaspoon baking soda, and half teaspoon salt. You can also throw in a little cayenne pepper, chili powder or nutmeg…I thought I was being all clever and sophisticated, but I couldn’t taste them.
Make a well in center of dry mix and pour in 6 tablespoons vegetable oil, 1 teaspoon vanilla extract, 1 tablespoon white vinegar, and 1 cup cold water. Stir till smooth. This is when I threw in a couple handfuls of semi-sweet chocolate chips. These are a great addition, but some sunk – if I had thought of it earlier and put them in with the dry ingredients, it would have been better. Bake until a chopstick inserted in center comes out clean. In a square pan, this will be about 40 minutes. – with the cassarole dish, which was deeper and smaller, it took about an hour. You're supposed to let it cook completely, but it's really good while it's still a tiny bit warm.
Bonus tip: Best Icing Ever, I am completely serious:
I improvised some buttercream the way I always do – cream soft butter (regular, not unsalted), add a drip of vanilla, and confectioners sugar by the spoonful, scrape down the sides of the bowl, keep tasting…but today, I threw in a chunk of cream cheese. Whip until fluffy. This is more definitely the best icing I have ever made, and it may be the best icing I have ever eaten.Wednesday, April 22, 2009
Dinner Tonight: Chickpea Tangine.
* 2 Tbs. olive oil
* Half a gigantic onion, thinly sliced
* 3 cloves garlic, minced (1 Tbs. minced from the jar.)
* i lb dried chickpeas, soaked about 18 hrs and rinsed
* several baby carrots, sliced into small chunks
* ¼ cup raisins
* 1 tsp. ground turmeric (shocked to find I had this in my cabinet)
* 1 tsp. ground cinnamon
* 1 tsp. ground cumin
* ¼ tsp. cayenne pepper
* 2 tsp. honey
(I used Really Raw honey, but didn't see any of the usual miscellaneous bee parts - Eric must have eaten them all in the top layer.)
* ½ cup plain Greek-style yogurt
The night before:
pick over the dried chick peas, rinse them in a colander, and put them in a large pot with 6 or so cups of water. I left them on the counter overnight, but transferred them the fridge before I left for work.
When you plan to cook them:
Take soaked chick peas out of fridge, rinse them one last time, cover generously with cold water and set them to boil until you can crush one with a little effort. It took about 30 minutes here. Raw chickpeas taste a little like raw chestnuts, which I don't recommend either. Cooked chick peas taste a little like roasted chestnuts, and retain some of their springyness. Stop cooking them before they get mushy.
(The original recipe called for canned chick peas, rinsed, which would make this a 20-minute dish, and I'm sure that would be fine too. I'm just a dried bean snob. And cheap.)
Heat oil in dutch over over medium heat.
Add onion and garlic, and sauté until onion slices are soft.
Stir in cooked, drained chickpeas, carrots, raisins, spices, honey, and 2 cups water.
Cover and simmer 20 to 25 minutes, stirring occasionally.
Keep an eye on it - I had to add about a half-cup more water at the 11 minute mark.
Serve, with a spoonful of yogurt.
Benefits from some salt and pepper.
THIS was a total winner, didn't take long, was definitely not technically challenging, and all with staple foods! We had everything except the yogurt already around the house. It's really delicious.
The original recipe is from last October Vegetarian Times. As I said above, it's even faster and easier.
* Half a gigantic onion, thinly sliced
* 3 cloves garlic, minced (1 Tbs. minced from the jar.)
* i lb dried chickpeas, soaked about 18 hrs and rinsed
* several baby carrots, sliced into small chunks
* ¼ cup raisins
* 1 tsp. ground turmeric (shocked to find I had this in my cabinet)
* 1 tsp. ground cinnamon
* 1 tsp. ground cumin
* ¼ tsp. cayenne pepper
* 2 tsp. honey
(I used Really Raw honey, but didn't see any of the usual miscellaneous bee parts - Eric must have eaten them all in the top layer.)
* ½ cup plain Greek-style yogurt
The night before:
pick over the dried chick peas, rinse them in a colander, and put them in a large pot with 6 or so cups of water. I left them on the counter overnight, but transferred them the fridge before I left for work.
When you plan to cook them:
Take soaked chick peas out of fridge, rinse them one last time, cover generously with cold water and set them to boil until you can crush one with a little effort. It took about 30 minutes here. Raw chickpeas taste a little like raw chestnuts, which I don't recommend either. Cooked chick peas taste a little like roasted chestnuts, and retain some of their springyness. Stop cooking them before they get mushy.
(The original recipe called for canned chick peas, rinsed, which would make this a 20-minute dish, and I'm sure that would be fine too. I'm just a dried bean snob. And cheap.)
Heat oil in dutch over over medium heat.
Add onion and garlic, and sauté until onion slices are soft.
Stir in cooked, drained chickpeas, carrots, raisins, spices, honey, and 2 cups water.
Cover and simmer 20 to 25 minutes, stirring occasionally.
Keep an eye on it - I had to add about a half-cup more water at the 11 minute mark.
Serve, with a spoonful of yogurt.
Benefits from some salt and pepper.
THIS was a total winner, didn't take long, was definitely not technically challenging, and all with staple foods! We had everything except the yogurt already around the house. It's really delicious.
The original recipe is from last October Vegetarian Times. As I said above, it's even faster and easier.
Subscribe to:
Posts (Atom)